
 تويت
تويت
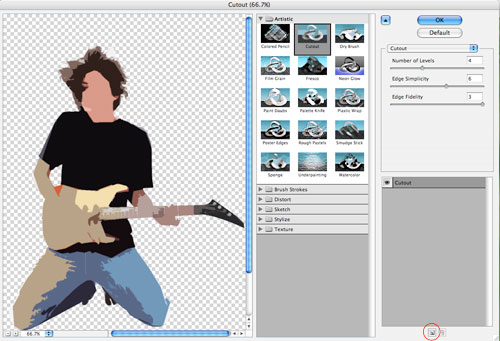
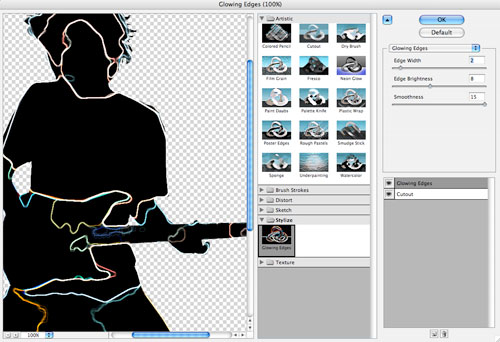
Create a Trendy Music Style Background

It’s quite trendy these days to use bright, vibrant colors with wavy lines and a silhouette of a person. This tutorial will aim to show you how to create this look. It’s the longest and most extensive tutorial I’ve written to date. I really hope you can learn from it; I know I did, by creating it
!
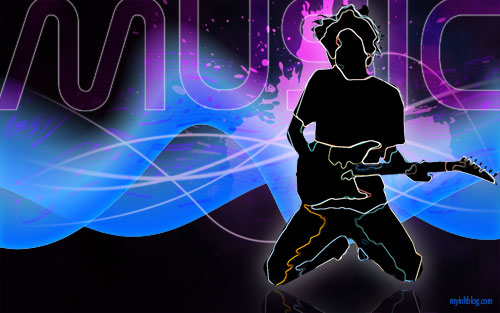
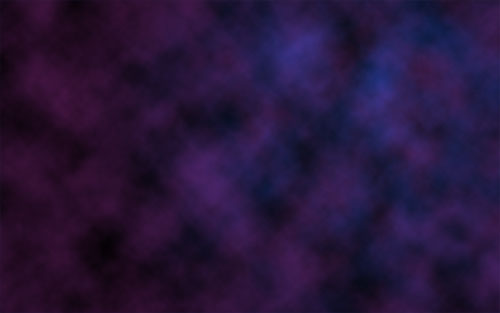
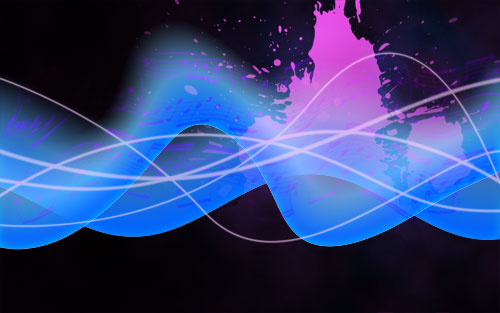
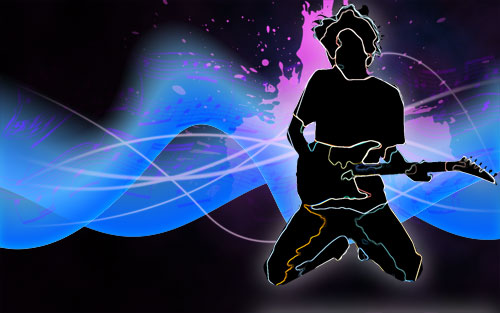
Here’s a look at what we are trying to accomplish
Step 1
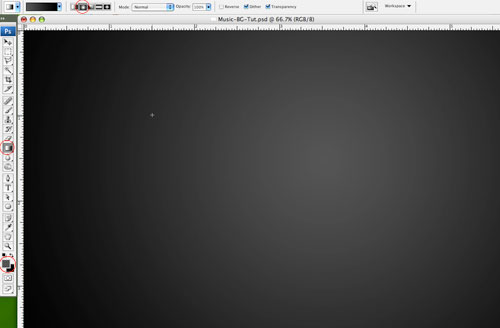
Open up Photoshop and create a new document to the size of your monitor.
Step 2
Create a radial gradient from black (#000000) to dark gray (#555555) with the gray slightly skewed to the right. Like below.
Step 3
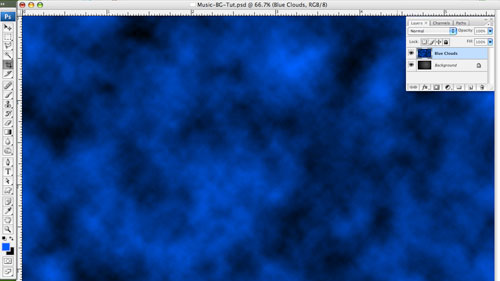
Create a new layer above the background, call it ‘Blue Clouds’. Change the foreground color to a vibrant blue, I used #0060ff, and make the background color black. Click Filter->Render->Clouds.
Step 4
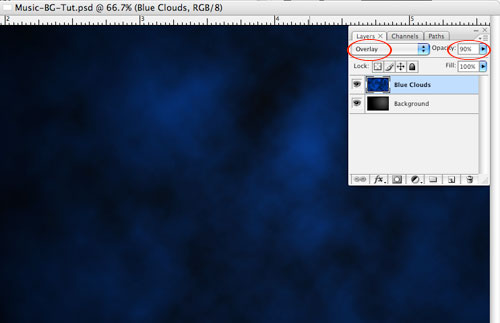
While still on the ‘Blue Clouds’ layer change the Blend Mode to Overlay, and the Opacity to 90%
Step 5
Add a new layer above ‘Blue Clouds’, name this layer ‘Pink Clouds’. Change your foreground color to a vibrant pink (I used #ff4ffd), keep the background color as black. Click Filter->Render->Clouds once again.
Step 6
Keep the Blend Mode as Normal, change the Opacity to 30%.
Step 7
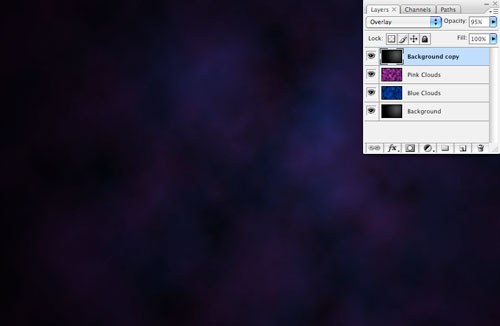
OK, we’ve got some nice color and interest here, but we need to crank it back a few notches. Make a copy of the background layer and place it at the top of the layers. Change the Blend Mode to Overlay and the Opacity to 90%
Step 8
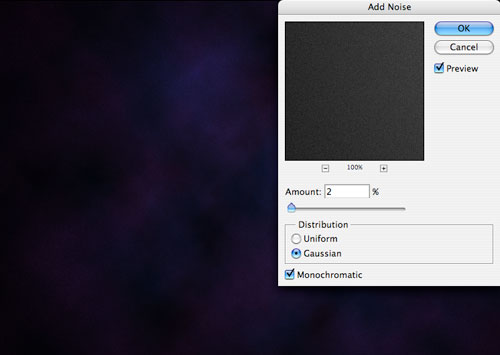
Let’s add a little more interest with some noise. While on the ‘Background Copy’ layer, click Filter->Noise->Add Noise, change the amount to 2%, the distribution to gaussian, and check monochromatic.
Step 9
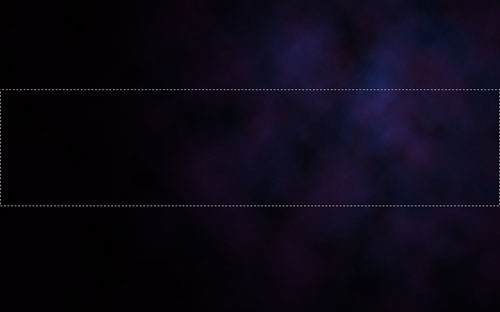
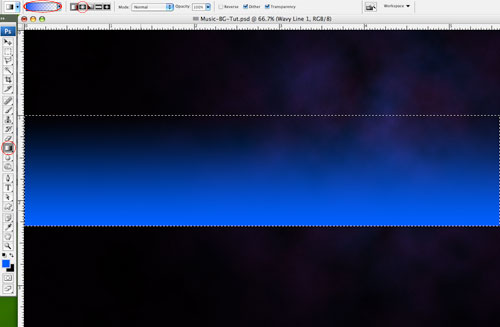
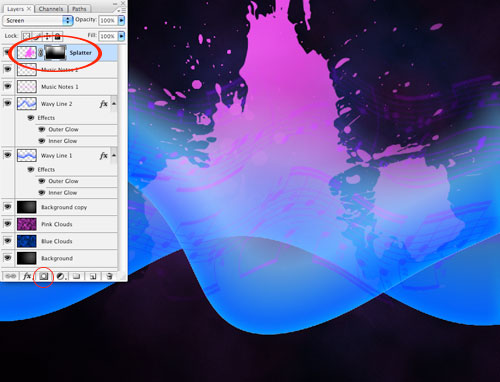
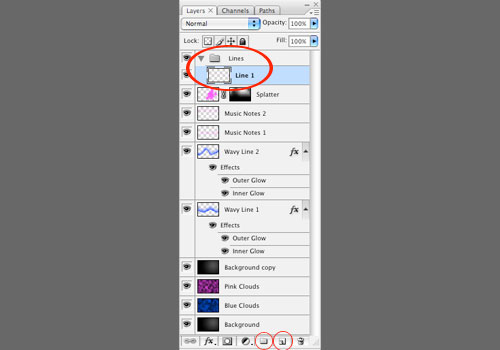
Now it’s time to create the big blue wavy lines. Create a new layer at the top of the layers palette and name it ‘Wavy Line 1′. Grab the rectangle marquee tool and draw a rectangle like below.
Step 10
Grab the Gradient Tool again, change the Mode to Linear, and set the Gradient Editor to go from that same vibrant blue (#0060ff) to transparent. Click and drag out a gradient within the rectangle marquee you drew out in the previous step.
Step 11
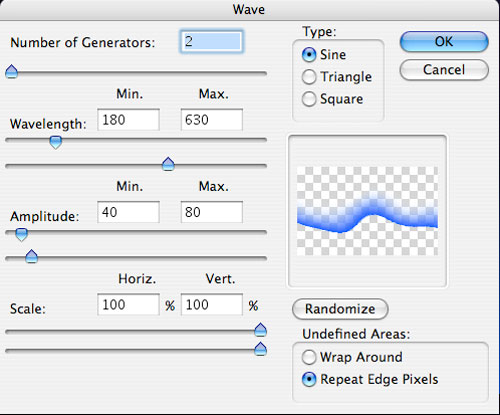
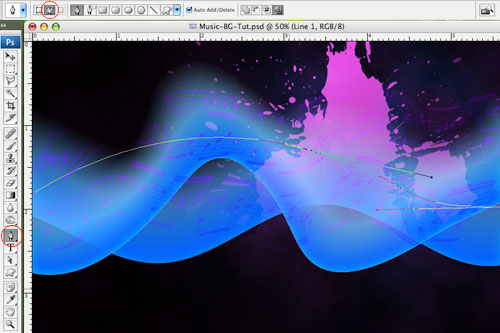
Deselect the rectangle by pressing ‘ctrl, d’. Click Filter->Distort->Wave. Change the settings to as follows: Number of Generators 2, Wavelength Min 180, Max 630, Amplitude Min 40, Max 80. Keep the scale at 100% for both, keep the radio button on Repeat Edge Pixels. Click randomize until the preview looks the way you’d like. Click OK.
Step 12
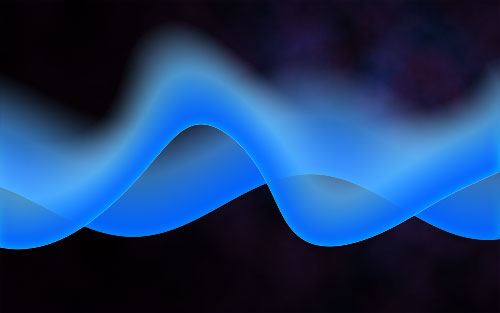
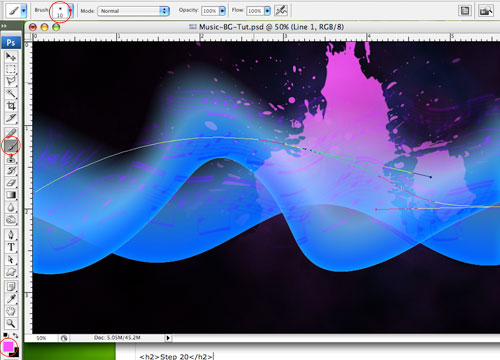
Let’s add a little style to our wavy line. Double click next to the layer name to bring up the layer style window. Click to add an outer glow. Change the opacity to 38%, the color to white, the spread to 12% and the size to 0px, for the rest of the options keep the defaults. Also add an inner glow. Change the blend mode to overlay, opacity to 32%, color to white and the size to 40. You should end up with something like what you see below

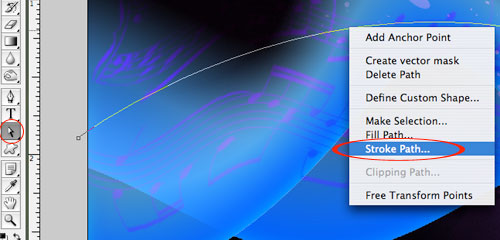
Step 13
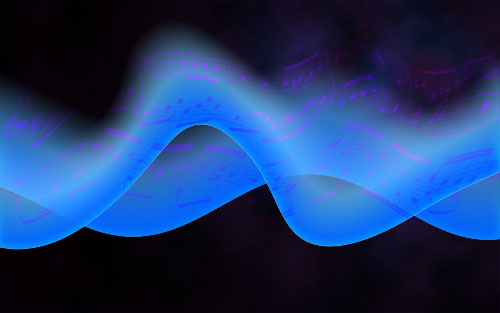
Rinse, Lather, Repeat. Add another similar wavy lines on a separate layer. Alter the distort settings slightly and remember if you hit randomize within the distort options you can get a different look each time. Brighten up the opacity a bit on both the inner and outer glow. You should end up with something like this.
!
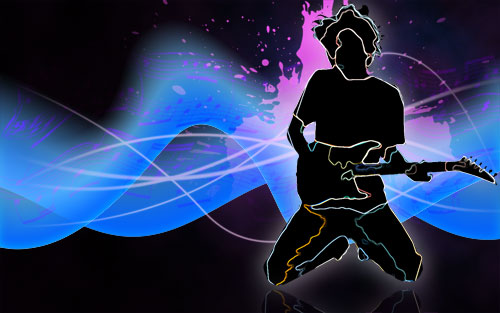
Here’s a look at what we are trying to accomplish
Step 1
Open up Photoshop and create a new document to the size of your monitor.
Step 2
Create a radial gradient from black (#000000) to dark gray (#555555) with the gray slightly skewed to the right. Like below.
Step 3
Create a new layer above the background, call it ‘Blue Clouds’. Change the foreground color to a vibrant blue, I used #0060ff, and make the background color black. Click Filter->Render->Clouds.
Step 4
While still on the ‘Blue Clouds’ layer change the Blend Mode to Overlay, and the Opacity to 90%
Step 5
Add a new layer above ‘Blue Clouds’, name this layer ‘Pink Clouds’. Change your foreground color to a vibrant pink (I used #ff4ffd), keep the background color as black. Click Filter->Render->Clouds once again.
Step 6
Keep the Blend Mode as Normal, change the Opacity to 30%.
Step 7
OK, we’ve got some nice color and interest here, but we need to crank it back a few notches. Make a copy of the background layer and place it at the top of the layers. Change the Blend Mode to Overlay and the Opacity to 90%
Step 8
Let’s add a little more interest with some noise. While on the ‘Background Copy’ layer, click Filter->Noise->Add Noise, change the amount to 2%, the distribution to gaussian, and check monochromatic.
Step 9
Now it’s time to create the big blue wavy lines. Create a new layer at the top of the layers palette and name it ‘Wavy Line 1′. Grab the rectangle marquee tool and draw a rectangle like below.
Step 10
Grab the Gradient Tool again, change the Mode to Linear, and set the Gradient Editor to go from that same vibrant blue (#0060ff) to transparent. Click and drag out a gradient within the rectangle marquee you drew out in the previous step.
Step 11
Deselect the rectangle by pressing ‘ctrl, d’. Click Filter->Distort->Wave. Change the settings to as follows: Number of Generators 2, Wavelength Min 180, Max 630, Amplitude Min 40, Max 80. Keep the scale at 100% for both, keep the radio button on Repeat Edge Pixels. Click randomize until the preview looks the way you’d like. Click OK.
Step 12
Let’s add a little style to our wavy line. Double click next to the layer name to bring up the layer style window. Click to add an outer glow. Change the opacity to 38%, the color to white, the spread to 12% and the size to 0px, for the rest of the options keep the defaults. Also add an inner glow. Change the blend mode to overlay, opacity to 32%, color to white and the size to 40. You should end up with something like what you see below
Step 13
Rinse, Lather, Repeat. Add another similar wavy lines on a separate layer. Alter the distort settings slightly and remember if you hit randomize within the distort options you can get a different look each time. Brighten up the opacity a bit on both the inner and outer glow. You should end up with something like this.

تعليق