
 تويت
تويت
Follow these simple steps to create the following animated liquid screen saver effect.
(This tutorial assumes working knowledge of creation animations and is created in Photoshop CS2)
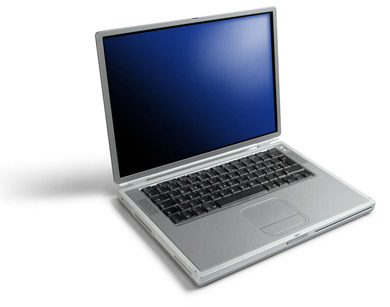
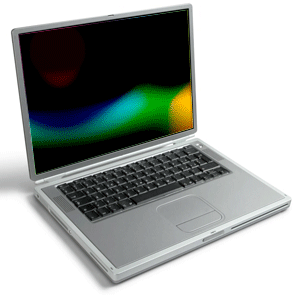
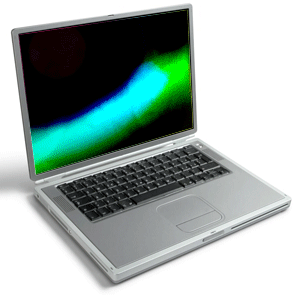
Below is the image I will use courtesy of AbsolutVision Photo Library.
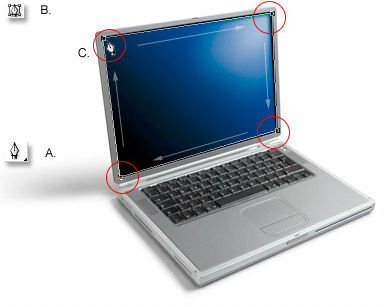
Create a Closed Path:
A. Select the Pen Tool (P) from the Toolbar.
B. Activate 'Paths' Option for the Pen Tool.
C. Then click to add four Anchor Points (encircled in red) in the direction of the captured arrows.
Note: The fourth Anchor Point connects to the First one to create a Closed Path.
Use the Closed Path to create a Gradient Fill Adjustment Mask:
A. Activate the Path Selection tool from the Toolbar. Click on the previously drawn path, then select the 'New Fill/Adjustment Layer' icon and from the list choose 'Levels..'.
Then just click OK - don't set anything here yet.
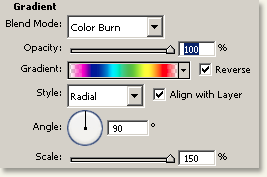
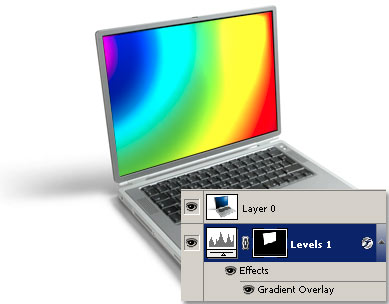
Apply Gradient Style to Levels Adjustment Layer:
Right click on the 'Levels 1' layer and choose Blending Options and set the following Gradient Style.
This is the result thus far.
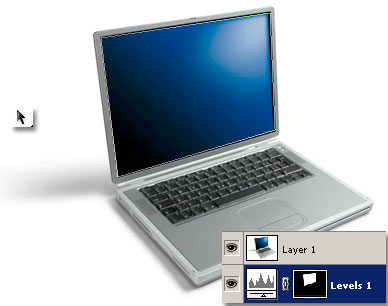
Create one more Gradient Adjustment Layer:
A. Activate the Path Selection tool from the Toolbar.
B. Click on the previously drawn path
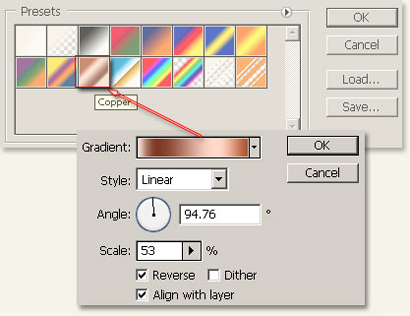
C. Then select the 'New Fill/Adjustment Layer' icon and from the list choose 'Gradients..'.
Set the Gradient properties to the below capture.
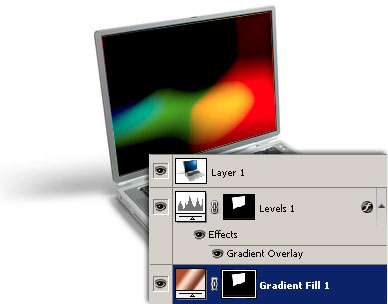
This is the resulting document view and Layers Palette view.
Create the animated effect:
A. Open Animation Palette (Window/Animation).
B. From the Animation Palette, click the 'Duplicate Selected Frame' icon.
C. Double click the 'Gradient Overlay' blending style from the 'Levels 1' layer.
D. Cursor over the document view and click and drag the gradient style to your right. Just slightly! You should notice a motion effect.
E. Click OK to exit Blending Styles panel.
Then repeat process, starting at B above.
(This tutorial assumes working knowledge of creation animations and is created in Photoshop CS2)
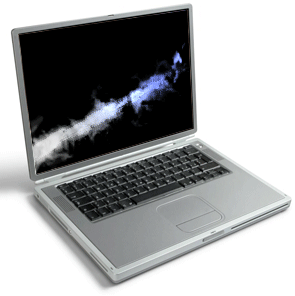
Below is the image I will use courtesy of AbsolutVision Photo Library.
Create a Closed Path:
A. Select the Pen Tool (P) from the Toolbar.
B. Activate 'Paths' Option for the Pen Tool.
C. Then click to add four Anchor Points (encircled in red) in the direction of the captured arrows.
Note: The fourth Anchor Point connects to the First one to create a Closed Path.
Use the Closed Path to create a Gradient Fill Adjustment Mask:
A. Activate the Path Selection tool from the Toolbar. Click on the previously drawn path, then select the 'New Fill/Adjustment Layer' icon and from the list choose 'Levels..'.
Then just click OK - don't set anything here yet.
Apply Gradient Style to Levels Adjustment Layer:
Right click on the 'Levels 1' layer and choose Blending Options and set the following Gradient Style.
This is the result thus far.
Create one more Gradient Adjustment Layer:
A. Activate the Path Selection tool from the Toolbar.
B. Click on the previously drawn path
C. Then select the 'New Fill/Adjustment Layer' icon and from the list choose 'Gradients..'.
Set the Gradient properties to the below capture.
This is the resulting document view and Layers Palette view.
Create the animated effect:
A. Open Animation Palette (Window/Animation).
B. From the Animation Palette, click the 'Duplicate Selected Frame' icon.
C. Double click the 'Gradient Overlay' blending style from the 'Levels 1' layer.
D. Cursor over the document view and click and drag the gradient style to your right. Just slightly! You should notice a motion effect.
E. Click OK to exit Blending Styles panel.
Then repeat process, starting at B above.
تعليق